Walk into a dark pantry with your arms full of groceries and the light just… comes on. No fumbling for a switch. That is a sensor light at work, and the good news is you don't need a fancy “smart” fitting to get it. Almost any light can be turned into a sensor light by adding one small part: a motion sensor.
This guide explains it all in plain English, no electrical jargon, no assumptions. By the end you will know how sensor lights work, what parts you need, whether you can do it yourself, and five solid options to suit different spots around the home.
How does a sensor light actually work?
A motion sensor is a small device that watches an area for movement. When it detects someone, it sends power to the light and switches it on. When the area has been still for a set amount of time, it switches the light back off again. That is the whole idea.
There are two common types you will see: PIR and microwave.
- PIR (passive infra-red): detects body heat as it moves across the sensor. This is the most common type, reliable, affordable, and great for rooms, hallways and cupboards.
- Microwave: sends out a harmless signal and detects movement in the bounce-back. It can “see” through thin materials like plastic, plaster, aluminium etc so it can be tucked out of sight inside a light fitting.
Most sensors also have a few small dials so you can fine-tune them: how long the light stays on, how much daylight is needed before it bothers switching on (so it does not run all day), and sometimes how sensitive it is to movement.
Can any light be turned into a sensor light?
In most cases, yes. The sensor simply sits between the power supply and the light, acting as an automatic switch. The light itself does not need to be anything special, a batten, a downlight, an oyster, even a simple globe can be wired through a sensor.
There are two main ways to set it up:
- A separate sensor that controls a normal light. The sensor is mounted on the wall or ceiling and wired to switch the light on and off. This is the most flexible option and works with almost any fitting.
- An all-in-one fitting with a sensor built in. Handy, but you are locked into that one light. Adding a separate sensor gives you far more choice.
A couple of things to check for compatibility:
- Make sure the light’s wattage is within the sensor’s rated load. Every sensor lists a maximum it can handle (for example “300W LED”). LED lights use very little power, so you can usually run several before getting near the limit.
- Match it to the space. Check the detection range and angle, and the recommended mounting height. A tiny cupboard sensor and a hallway sensor are built for very different jobs.
- Indoor vs outdoor. For anywhere damp or exposed, use a weather-rated sensor (look for a higher “IP” number). Most indoor-only sensors are IP20, which means keep them dry.
Should you DIY it, or call an electrician?
For Australia: if the sensor needs to be wired into your mains wiring, which nearly all of these do, the law says a licensed electrician must do the work. It is not a grey area. Fixed electrical wiring is not a legal DIY job anywhere in Australia, even if you are handy. It also keeps your insurance and warranty valid, and keeps everyone in the house safe.
The good news is that this is a quick, inexpensive job for a sparky. Swapping in or adding a sensor usually takes well under an hour, and many customers get it done at the same time as other electrical work.
What you can do yourself: choose the right sensor for the spot, buy it, and have it ready to go. Plug-in and battery-powered sensor lights (the kind that stick up under a cupboard or sit in a wardrobe) are the genuine DIY options, no wiring, no electrician. But for any sensor that connects to your home’s wiring, line up a licensed electrician to install it.
What you need: a quick checklist
- The light you want to control (or one you already have).
- A motion sensor suited to the room, see the picks below.
- The right spot to mount it, with a clear view of where people walk.
- A licensed electrician for anything hardwired (most sensors).
Five popular sensor picks for around the home
Here are five we like, each suited to a different situation. Prices were correct at the time of writing.
1. Best for cupboards & pantries, Superlux Mini 1.5m PIR Sensor
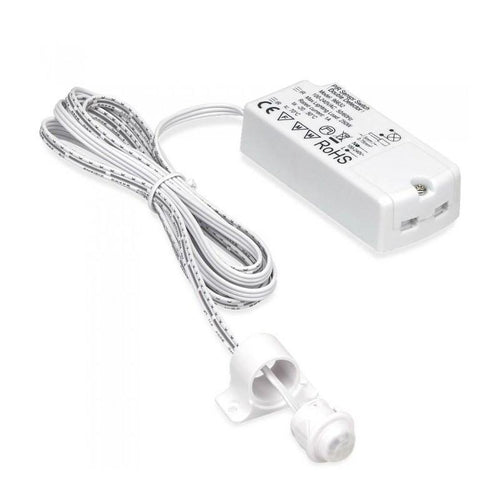
A neat little sensor built for small, enclosed spaces. With a short 1.5-metre range it reacts the moment you open the door, then switches the light off on its own after about 45 seconds. It works in any light level, so it does its job day or night. Ideal for pantries, linen cupboards and similar nooks.
| Best for | Cupboards, pantries, small enclosed spaces |
| Detection range | 1.5 metres |
| Auto-off | After ~45 seconds |
| Suits | Indoor use |
| Price | $48.98 |
View the Superlux Mini 1.5m PIR Sensor →
2. Best for hiding out of sight, Havit Microwave Sensor
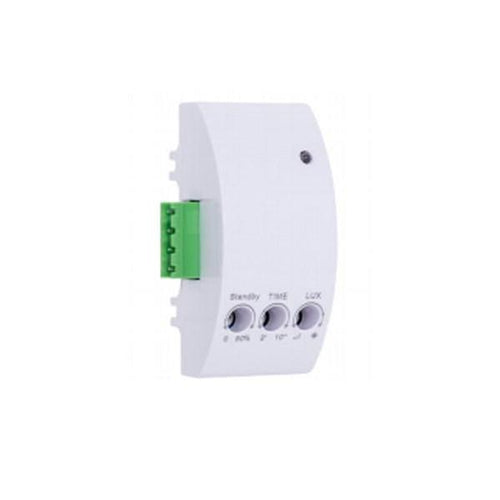
Because this is a microwave sensor, it can “see” through the plastic cover of an LED batten, so it can be tucked inside the fitting and stay completely hidden. You get automatic light with no visible sensor at all. It reaches up to 15 metres across a full 360 degrees, with an adjustable delay from 2 seconds up to 10 minutes. A favourite for garages, laundries and storerooms running LED battens.
| Best for | Hiding inside LED batten fittings |
| Type | Microwave (sees through plastic) |
| Detection | Up to 15m, 360° |
| Time delay | 2 seconds to 10 minutes |
| Suits | Indoor use (IP20) |
| Price | $32.84 |
View the Havit Microwave Sensor for LED Battens →
3. Best modern surface-mounted look, CLA Sens Series 360°
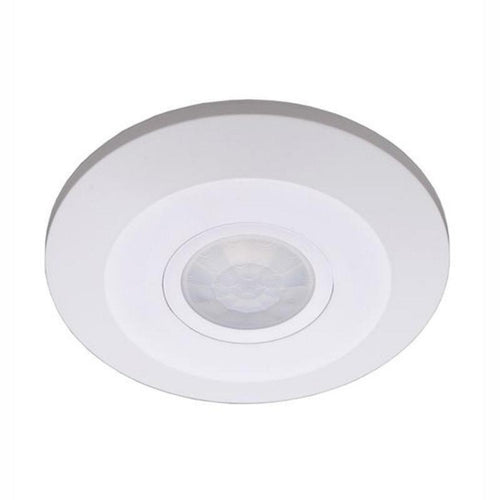
A clean, modern white sensor that mounts onto the ceiling and covers a full 360 degrees up to 6 metres. It is built to drive plenty of light (up to 1000W of LED), with an adjustable on-time from 10 seconds to 15 minutes and a daylight setting so it only triggers when it is actually dark enough to need it. Backed by a 5-year warranty. Great for ensuites, hallways and entryways where you want it to look tidy.
| Best for | A modern surface-mounted ceiling sensor |
| Detection | 360°, up to 6m |
| Mounting height | 2.2 – 4 metres |
| Time delay | 10 seconds to 15 minutes |
| Warranty | 5 years |
| Price | $35.58 |
View the CLA Sens Series 360° Sensor →
4. Classic wall-mounted all-rounder, Mercator Indoor/Outdoor Sensor
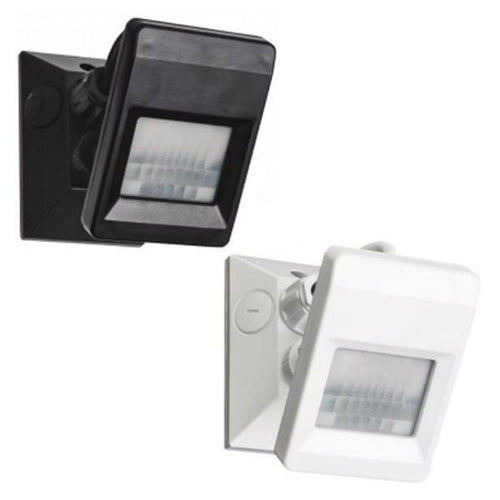
The familiar adjustable “wall-bracket” sensor you have seen on plenty of homes. The head swivels to aim wherever you need, it covers a 120-degree spread up to 18 metres, and it is weather-rated (IP66) so it works indoors or out. On-time adjusts from 10 seconds to 30 minutes, and it has a manual override. Comes in white or black. A dependable choice for entries, carports, patios and garages.
| Best for | Classic wall-mounted indoor/outdoor use |
| Detection | 120° wide, up to 18m |
| Weather rating | IP66 (indoor or outdoor) |
| Time delay | 10 seconds to 30 minutes |
| Colours | White or black |
| Price | $42.38 |
View the Mercator Indoor/Outdoor Sensor →
5. Best recessed (hidden flush) option, Brilliant Eye 360° Recessed PIR
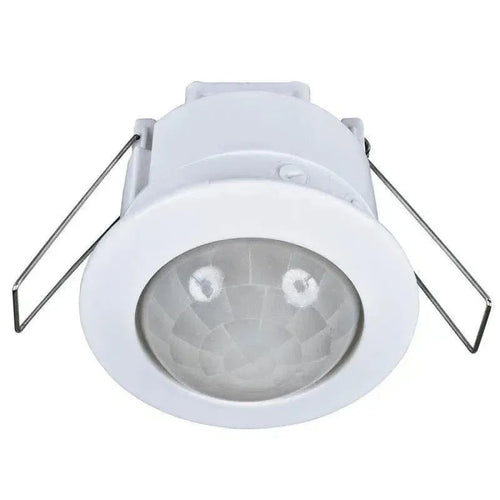
If you want a barely-there look, this one recesses into the ceiling and sits flush, much like a downlight. It scans a full 360 degrees up to 9 metres, with adjustable on-time (10 seconds to 20 minutes) and a daylight setting. It needs a 62mm cut-out and is for indoor use. Perfect for hallways and living areas where you would rather not see a sensor at all.
| Best for | A discreet recessed (flush) ceiling sensor |
| Detection | 360°, up to 9m |
| Cut-out required | 62mm |
| Time delay | 10 seconds to 20 minutes |
| Suits | Indoor use (IP20) |
| Price | $35.19 |
View the Brilliant Eye 360° Recessed PIR Sensor →
The bottom line
Turning an ordinary light into a hands-free sensor light is one of the cheapest, most satisfying upgrades you can make. Pick the sensor that suits the spot, keep the light’s wattage within the sensor’s limit, and for anything hardwired, have a licensed electrician fit it. From there, the lights just look after themselves.
Not sure which sensor fits your space? Get in touch and the team at The Lighting Outlet will point you in the right direction.